Lego On-Line Testing System (KLOTS)
Project Overview
Responsible:
- Christian Motika
- Yvan Benekov
KLOTS - KIELER Lego On-line Testing Systemhttp://trac.rtsys.informatik.uni-kiel.de/trac/kieler/wiki/Projects/KLOTS#KLOTS-KIELERLegoOn-lineTestingSystem
![]()
Topics
- KLOTS - KIELER Lego On-line Testing Systemhttp://trac.rtsys.informatik.uni-kiel.de/trac/kieler/wiki/Projects/KLOTS#KLOTS-KIELERLegoOn-lineTestingSystem
Overview
The KIELER Lego On-line Testing System (KLOTS) subproject provides an IDE for easy development of leJOS-NXJ-based Java programs for the Lego Mindstorms NXT system. The main purpose of KLOTS is to allow the implementation and testing of programs written in the Synchronous Java (SJ) dialect, although "old-fashioned" Java programs are supported as well.
For more information about the leJOS NXJ project and especially the leJOS tutorial and NXT Programming API please visit the leJOS NXJ website.
Note that KLOTS currently uses leJOS NXJ v0.8.5, not the brand new v0.9.0. You can download the v0.8.5 API from .

Getting Started
The KLOTS is part of the KIELER Rich Client Application (RCA) which can be found in the Downloads. It is a standalone application containing all KLOTS features.
The required Eclipse plug-ins can also be downloaded from the KIELER update page. To get the full functionality of the KLOTS several plug-ins are required:
- de.cau.cs.kieler.core
- de.cau.cs.kieler.core.kivi
- de.cau.cs.kieler.core.model
- de.cau.cs.kieler.core.model.gmf
- de.cau.cs.kieler.core.model.xtext
- de.cau.cs.kieler.core.ui
- de.cau.cs.kieler.klots
- de.cau.cs.kieler.sim.kiem
- de.cau.cs.kieler.sim.kiem.config
- de.cau.cs.kieler.sim.kiem.ui
- de.cau.cs.kieler.sim.table
- de.cau.cs.kieler.sim.signals
- de.cau.cs.kieler.sim.syncsignalreset
- de.cau.cs.kieler.sj
- net.sf.antcontrib.cpptasks
- org.apache.bcel
- org.bluecove
- org.bluecove.gpl
- org.json
- org.lejos.classes
- org.lejos.jtools
- org.lejos.pccomms
- org.lejos.pctools
- If you want to be able to import KLOTS example programs using the KIELER Example Management (KEX), you will also need:
- de.cau.cs.kieler.core.kgraph
- de.cau.cs.kieler.kex
- de.cau.cs.kieler.kex.ui
- de.cau.cs.kieler.kiml
- de.cau.cs.kieler.kiml.service
- de.cau.cs.kieler.kiml.ui
- de.cau.cs.kieler.klots.examples
- be sure to click on the "Add Required Plug-ins" button
Then you should be able to start KIELER and select the KLOTS perspective (Window->Open Perspective->Other...->KLOTS).

USB and Bluetooth Connection Set-Up
In order to be able to communicate and exchange data with the Lego Mindstorms NXT brick, you need to ensure that the corresponding USB (and Bluetooth) drivers are properly installed and set-up.
Note: Currently there are some problems when using the 64-bit version of KLOTS. Since leJOS is using only the 32-bit Lego USB Fantom driver, you will not be able to connect the NXT brick via USB cable, i. e. you will also not be able to flash the leJOS firmware on the NXT. Bluetooth connection will work with most (but not all) bluetooth devices. So, if you want to be on the safe side, you will have to use the 32-bit version of KLOTS on your 64-bit machine.
USB set-up on Microsoft Windows systems
Download the Lego Fantom USB driver from the Lego Mindstorms website and install it. Note that if you have previously installed the standard Lego Mindstorms software, the Fantom driver is already installed on your computer.
(optional) Bluetooth set-up on Microsoft Windows systems
For the communication over Bluetooth, you will need a Bluetooth dongle or built-in support on your computer, and a Bluetooth software stack. The Microsoft and Widcomm stacks have been tested and proven to work, but other stacks should work as well.
Note: The BlueSoleil stack has been reported as currently not working with KLOTS.
USB set-up on Linux systems
On Linux you need libusb installed on your system. It can be obtained from http://libusb.sourceforge.net. It is pre-installed with many Linux distributions, or is available as an optional package. Note that libusb (legacy release 0.1.12) is required, not libusb1. To build the jlibnxt JNI library, which is used for USB access, you need the Development files for libusb (libusb-devel).
If you are running KLOTS from a non-root user, you will need to ensure that you have read and write access for the NXT USB device in /dev/bus/usb. If you can identify the device in /dev/bus/usb, you can do this by:
However, the yyy number will count up each time the NXT is disconnected and reconnected. A better solution is to use udev rules. How to do this may vary with different Linux systems. To use udev rules, set up a file such as /etc/udev/rules.d/70-lego.rules and populate it with the following lines:
BUS=="usb", SYSFS{idVendor}=="03eb", GROUP="a Linux user group", MODE="0660"
BUS=="usb", SYSFS{idVendor}=="0694", GROUP="a Linux user group", MODE="0660"
You should replace the a Linux user group entry with the user group to witch your Linux user account belongs. The two vendors are LEGO and Atmel (for the Sam-Ba driver used in firmware update mode). You may need to reload the rules or restart udev. On some Linux systems, the command to reload the rules is:
(optional) Bluetooth set-up on Linux systems
If you want to communicate with the NXT over Bluetooth, you will need a Linux supported Bluetooth dongle or built-in support on your computer. KLOTS uses the Bluecove libraries which are included in the distribution. Note however, that not all Bluetooth adapters are compatible with Linux. A list of the supported hardware in several Linux distributions can be found on the web, for example Ubuntu Hardwaredatenbank (German) for the Ubuntu distribution.
You may also need to install the libbluetooth and libbluetooth-dev libraries, however on most systems they are already pre-installed.
Installing the leJOS NXJ Firmware on the NXT Brick
In order to be able to download and execute Embedded Java programs, the leJOS NXJ firmware should be installed on your NXT brick. KLOTS provides an easy firmware flash feature. To install the leJOS NXJ firmware connect the NXT with the computer via USB and turn it on. Then select Window->Preferences->KIELER->Lego execution->Firmware flash and follow the instructions. You do not need to set the NXT brick in firmware-update mode, although doing so may help in case you are getting errors during the flash procedure. The whole process should not take more than a minute and after that the new firmware is permanently saved on the NXT's flash memory, so that the original Lego firmware is fully removed. If you want to remove the leJOS NXJ firmware and switch back to the original Lego firmware, you have to flash it on the NXT brick. More information on how to do so can be found on the Lego Mindstorms website.


Define Connection Protocol
Next you must specify how KLOTS shall communicate with the NXT brick. There are two possible options: communication via USB or communication via Bluetooth. Select Window->Preferences->KIELER->Lego execution and choose your favored connection type. In addition you can specify the brick's hardware address or friendly name. To save you all the manual selections, you can simply click on the Search for NXTs button and then choose your NXT from the list of found bricks. Note that for establishing Bluetooth connection, your NXT and computer should be already paired. The pairing procedure may vary with different operating systems and Bluetooth stacks. However you should always initiate it from the computer, not from the NXT brick. The default NXT PIN for the Bluetooth connection is set to 1234.


Create a New Embedded Java Project
In order to be able to write your first program, you should create a new Embedded Java project. To do so, select File->New->Project...->KIELER->Embedded Java Project. Then specify the new project's name and click on Finish. The project will be then automatically created and appears in the Project Explorer View on the right site.

Create a New Embedded Java File
You are now ready to create a new Embedded Java file. Click on the project and package in witch you wish to create the new file and select New->Other...->KIELER->Embedded Java File. Type in a name for the new file and click on Finish. Note that the file name should not exceed 20 characters including the file extension.

Introducing the KLOTS Editor
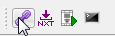
When the KLOTS perspective is activated, Embedded Java files (.java) will be automatically associated with the KLOTS Editor. To open an Embedded Java file simply double-click on it. The KLOTS Editor offers the full functionality of the standard Eclipse Java Editor as well as means to build, download and execute Embedded Java programs on the NXT brick. The easiest way to check if a file is displayed in the KLOTS Editor is to look at the editor's toolbar. There should be four new buttons.

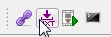
You can now write your code in the corresponding section and click on the Build Embedded Java Program button. Your program will then be build and linked with the leJOS NXJ library. An executable file named <your_program's_name>.nxj should appear in the project's bin folder.
Sometimes, while running your program on the NXT brick, you may get a "blue screen", i.e. the brick plays an error tune and a message like
Java Exception: |
Class: 16 |
Method: 331 |
PC: 28087 |
appears on the display. This indicates that an uncaught Java Runtime Exception, e.g. NullPointerException, occurred somewhere in your program. The error message indicates the kind of the exception and the method where it was thrown. This information is produced by the program build procedure and you can see it by clicking on the Details button. It can be very helpful for debugging your programs.

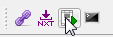
By clicking on the Download Embedded Java Program to NXT button the executable file will be downloaded to your NXT brick. The file will then appear in the Files submenu on the brick. Note that for the downloading process the NXT should be turned on and connected to the computer via USB. (You can also download programs via Bluetooth.)
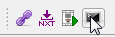
To run the program on your NXT brick, in case the program uses the remote print option and you want to enable remote printing, you should click on the Run Embedded Java Program on NXT button. The program will then be started on the NXT and you should specify on the brick whether or not you want to enable remote printing and the protocol for the connection with the computer (USB or Bluetooth). Then you should make the corresponding selection in KLOTS.
Remember to do the connection selection always on the NXT site first, since doing otherwise can trigger connection abort!
The remote prints will be then displayed on the KLOTS Console on the right site of the KLOTS Perspective. You can temporary disable the remote printing by clicking on the Disable Console button. You can then enable remote printing at any time by simply clicking on that button again.


If you are not using remote printing, or do not want to enable communication with a computer, you can also start a program by choosing it from the Files submenu on the NXT brick.
An Embedded Java sample program

